

Connecting a server
Open Settings → Connectors, pick a server from the catalog, complete auth if required, and save. The server is then available when you create an agent.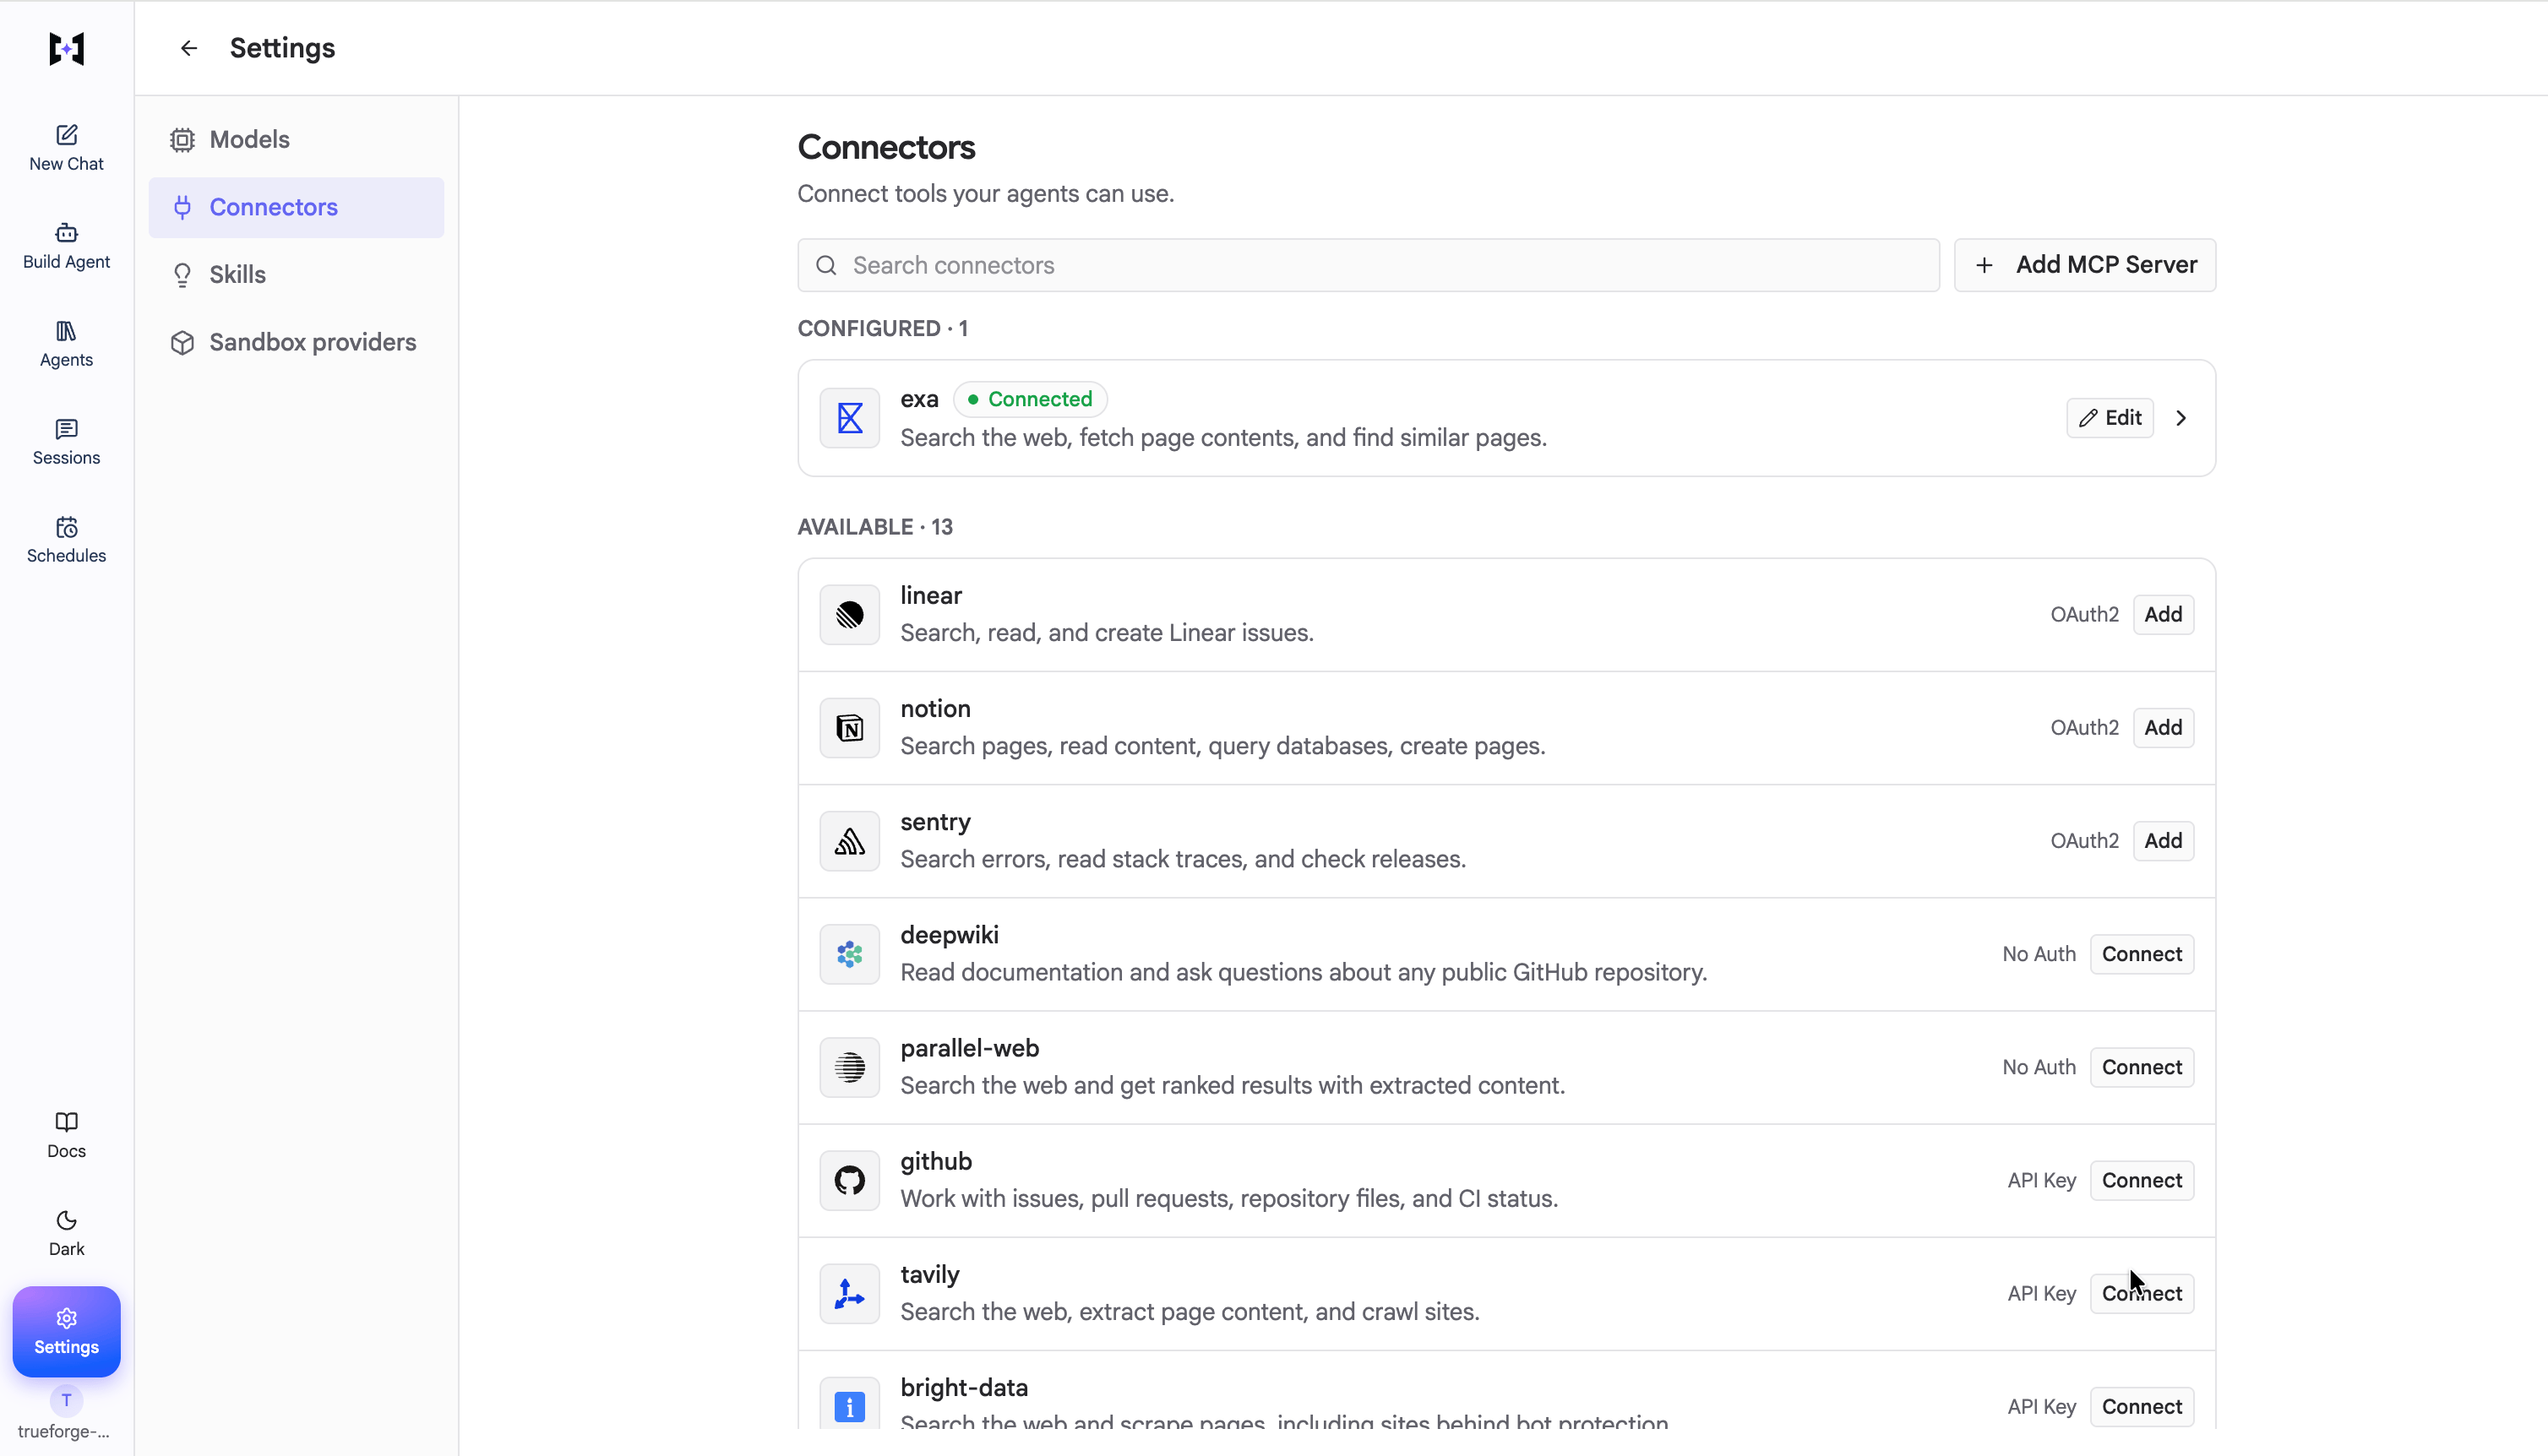
Settings → Connectors — connect a server from the catalog (each shows its auth type).
Authentication options
- No auth — public or network-trusted servers.
- Header auth — static HTTP headers (API keys, bearer tokens) sent on every request.
- OAuth (Dynamic Client Registration) — TrueForge registers as an OAuth client, runs the authorization-code flow, and stores and refreshes tokens. Users never paste tokens into the agent.
For OAuth to work, the MCP server must redirect the user back to your TrueForge instance — so the server needs to
know its own public address. That is the
PUBLIC_BASE_URL environment variable. It defaults to
http://localhost:<port>, which is fine on your own machine; set it whenever TrueForge is reached at a different
address (a domain, reverse proxy, or another host). Where to set it depends on how you run TrueForge — as an env var
for npx, in packages/trueforge/.env for Docker Compose, or server.publicBaseUrl for Helm. See the
Quickstart FAQ.In-chat authentication
If a server uses OAuth and the user has not yet authorized it, the turn pauses and the chat UI shows a Connect button. The user completes OAuth in a popup and continues the conversation — the agent does not fail.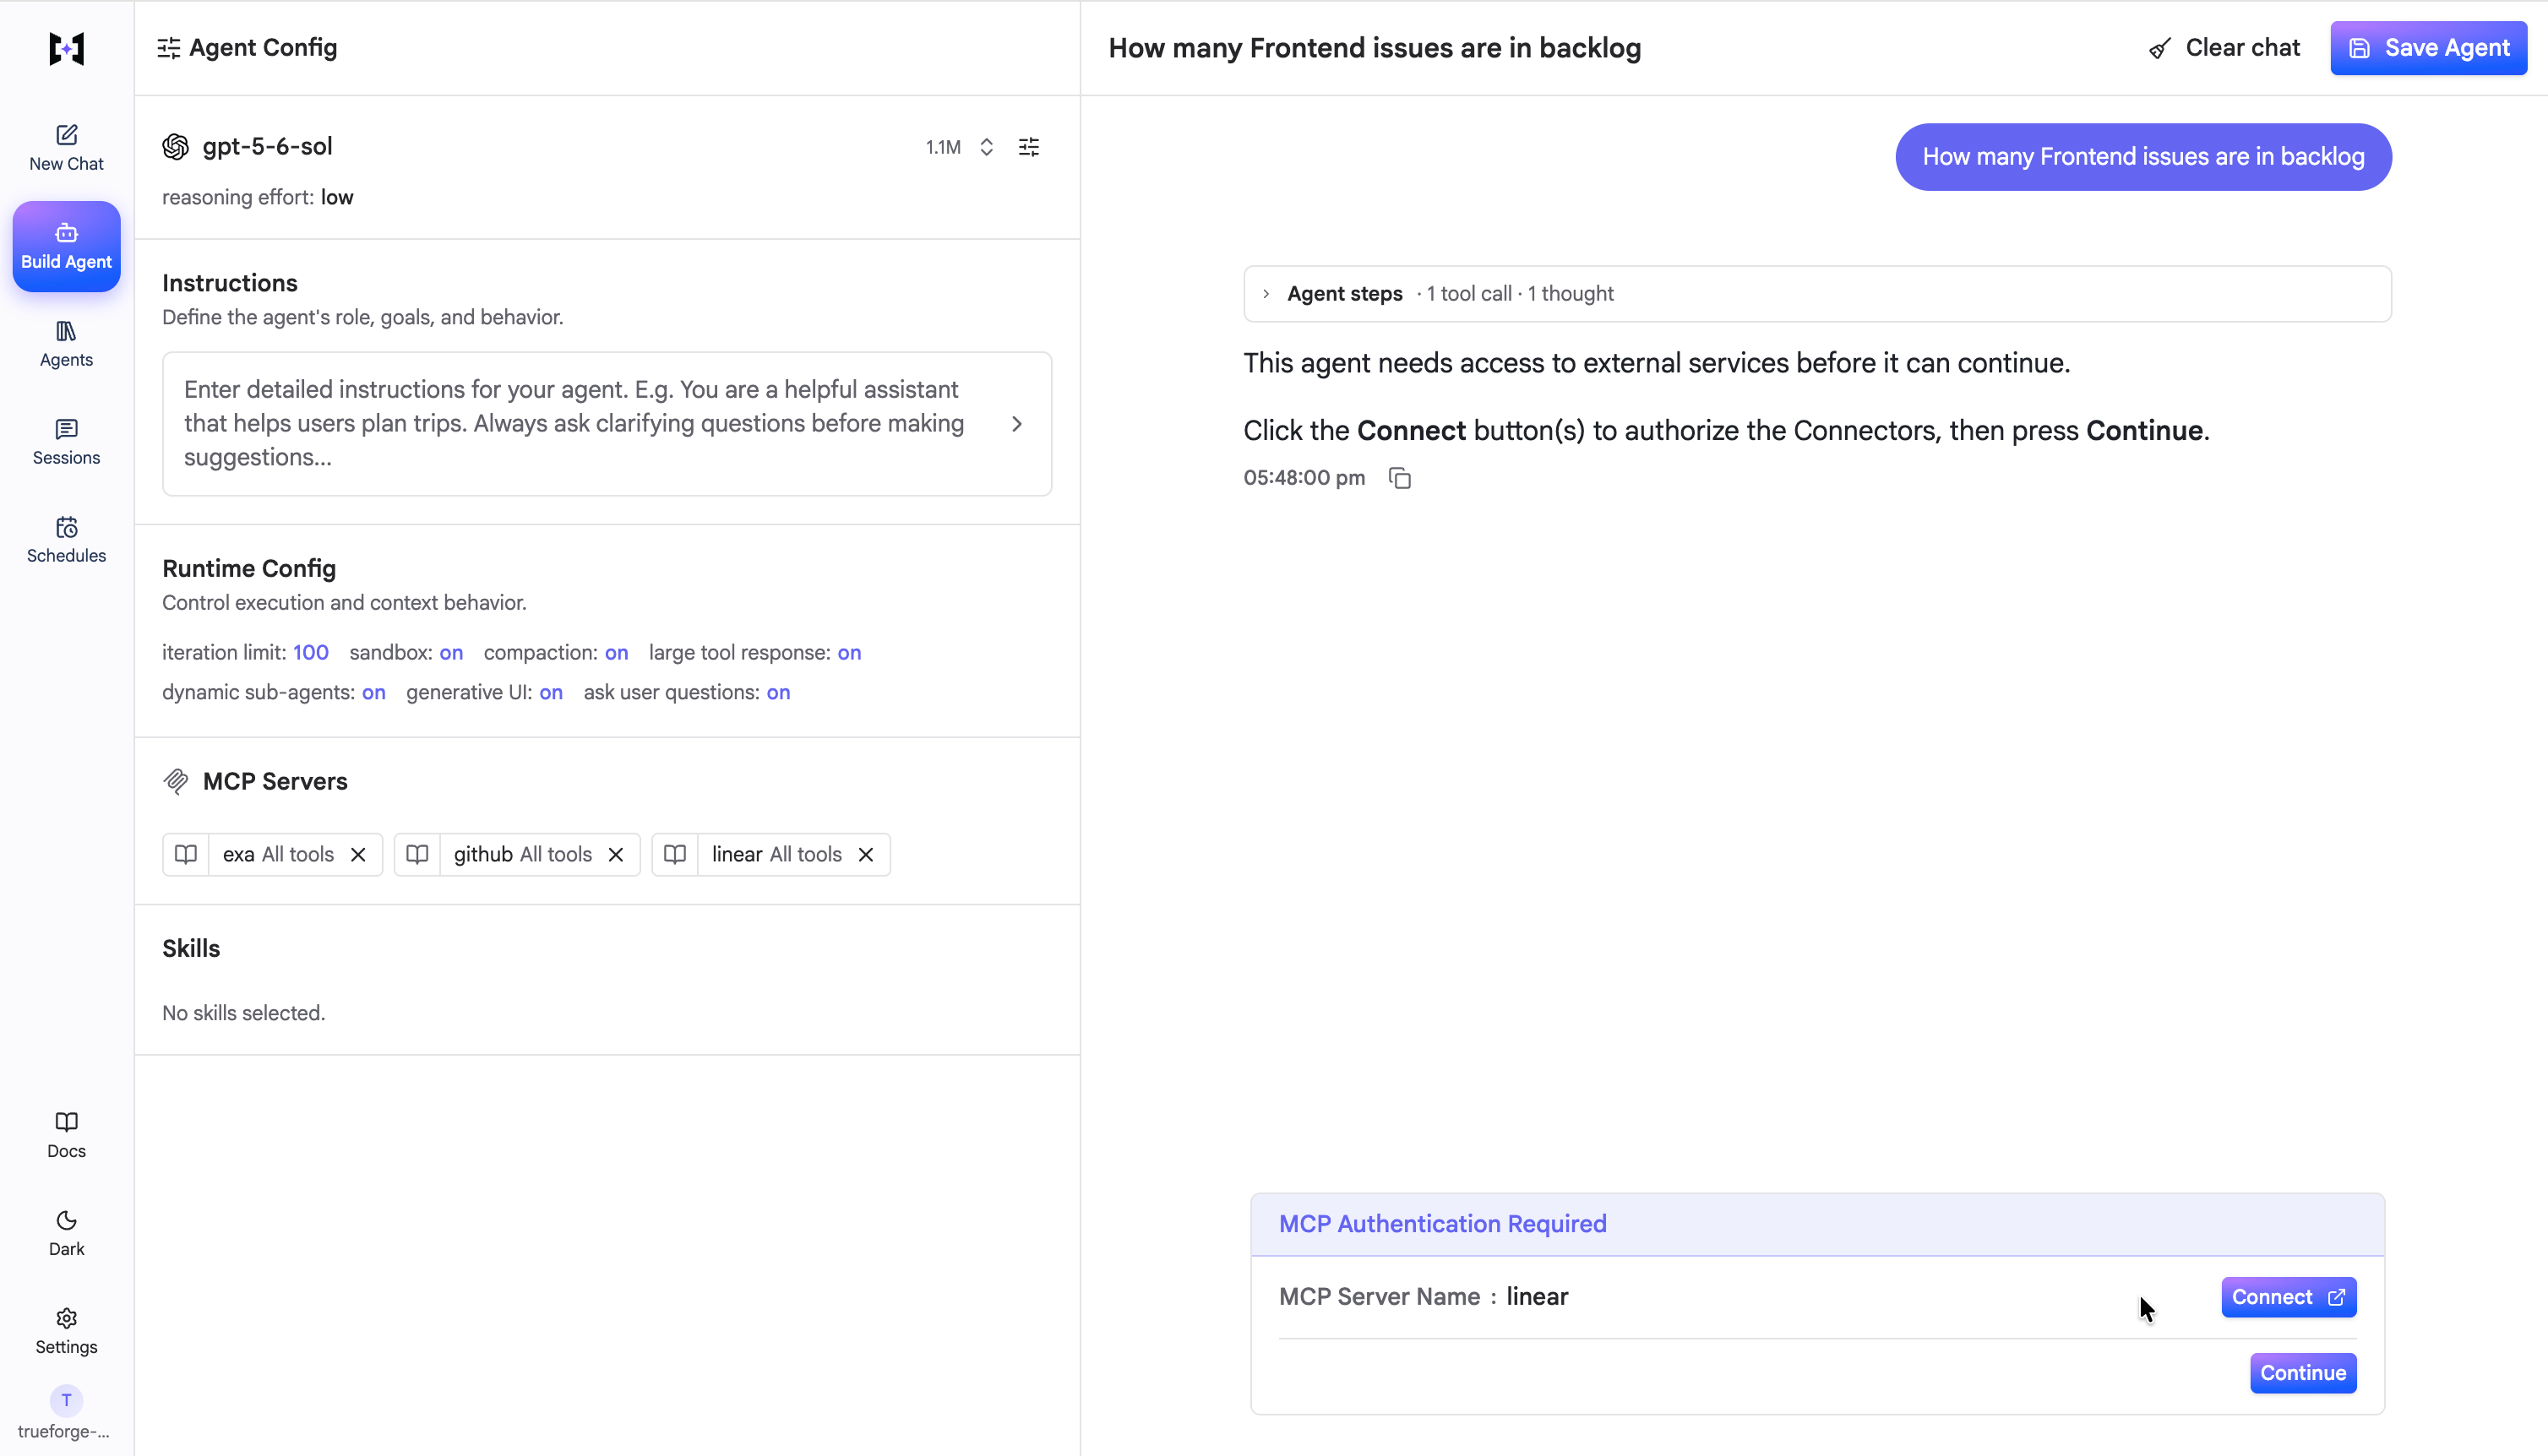
In-chat MCP authentication: the turn pauses with a Connect button until the user authorizes the server, then continues.
Next steps
- Attach MCP servers when you create an agent.
- Configure which tools need approval (API today).
- Keep tool schemas lean with deferred loading in Harness Capabilities.