

- What’s in an agent — every option, explained.
- Create an agent via the UI — the options available in the UI today.
- Create an agent via the API — the full agent spec, with every field.
What’s in an agent
Each option below is part of the agent definition. The Set in line on each shows where you can configure it today — the chat UI, the API, or both.Model
Model
temperature, max_tokens, top_p, top_k, reasoning_effort, and more — which are forwarded to the provider as-is.Set in: UI (which model) · API (model + parameters)Instructions
Instructions
MCP servers (tools)
MCP servers (tools)
- Which tools are enabled or disabled — expose everything, only read-only tools, or a specific list. Choose these in Select MCP Tools when you attach the server, or via the API.
- Preload — load a server’s full tool definitions upfront, or (default) discover them on demand to keep context lean. See Deferred Tool Loading. Toggle it on the connector’s chip in Build Agent, or via the API.
- Tool approval — pause before sensitive tool calls until a human approves. See below.
Tool approval
Tool approval
require_approval_for_tools defaults to ["@write", "@destructive"]). Read-only tools run on their own.@write and @destructive only match tools the MCP server has labeled. Many servers skip labels, so those tools run without asking — even if they change data. To pause on a specific tool anyway, list it by name, or set require_approval_for_tools to ["@all"].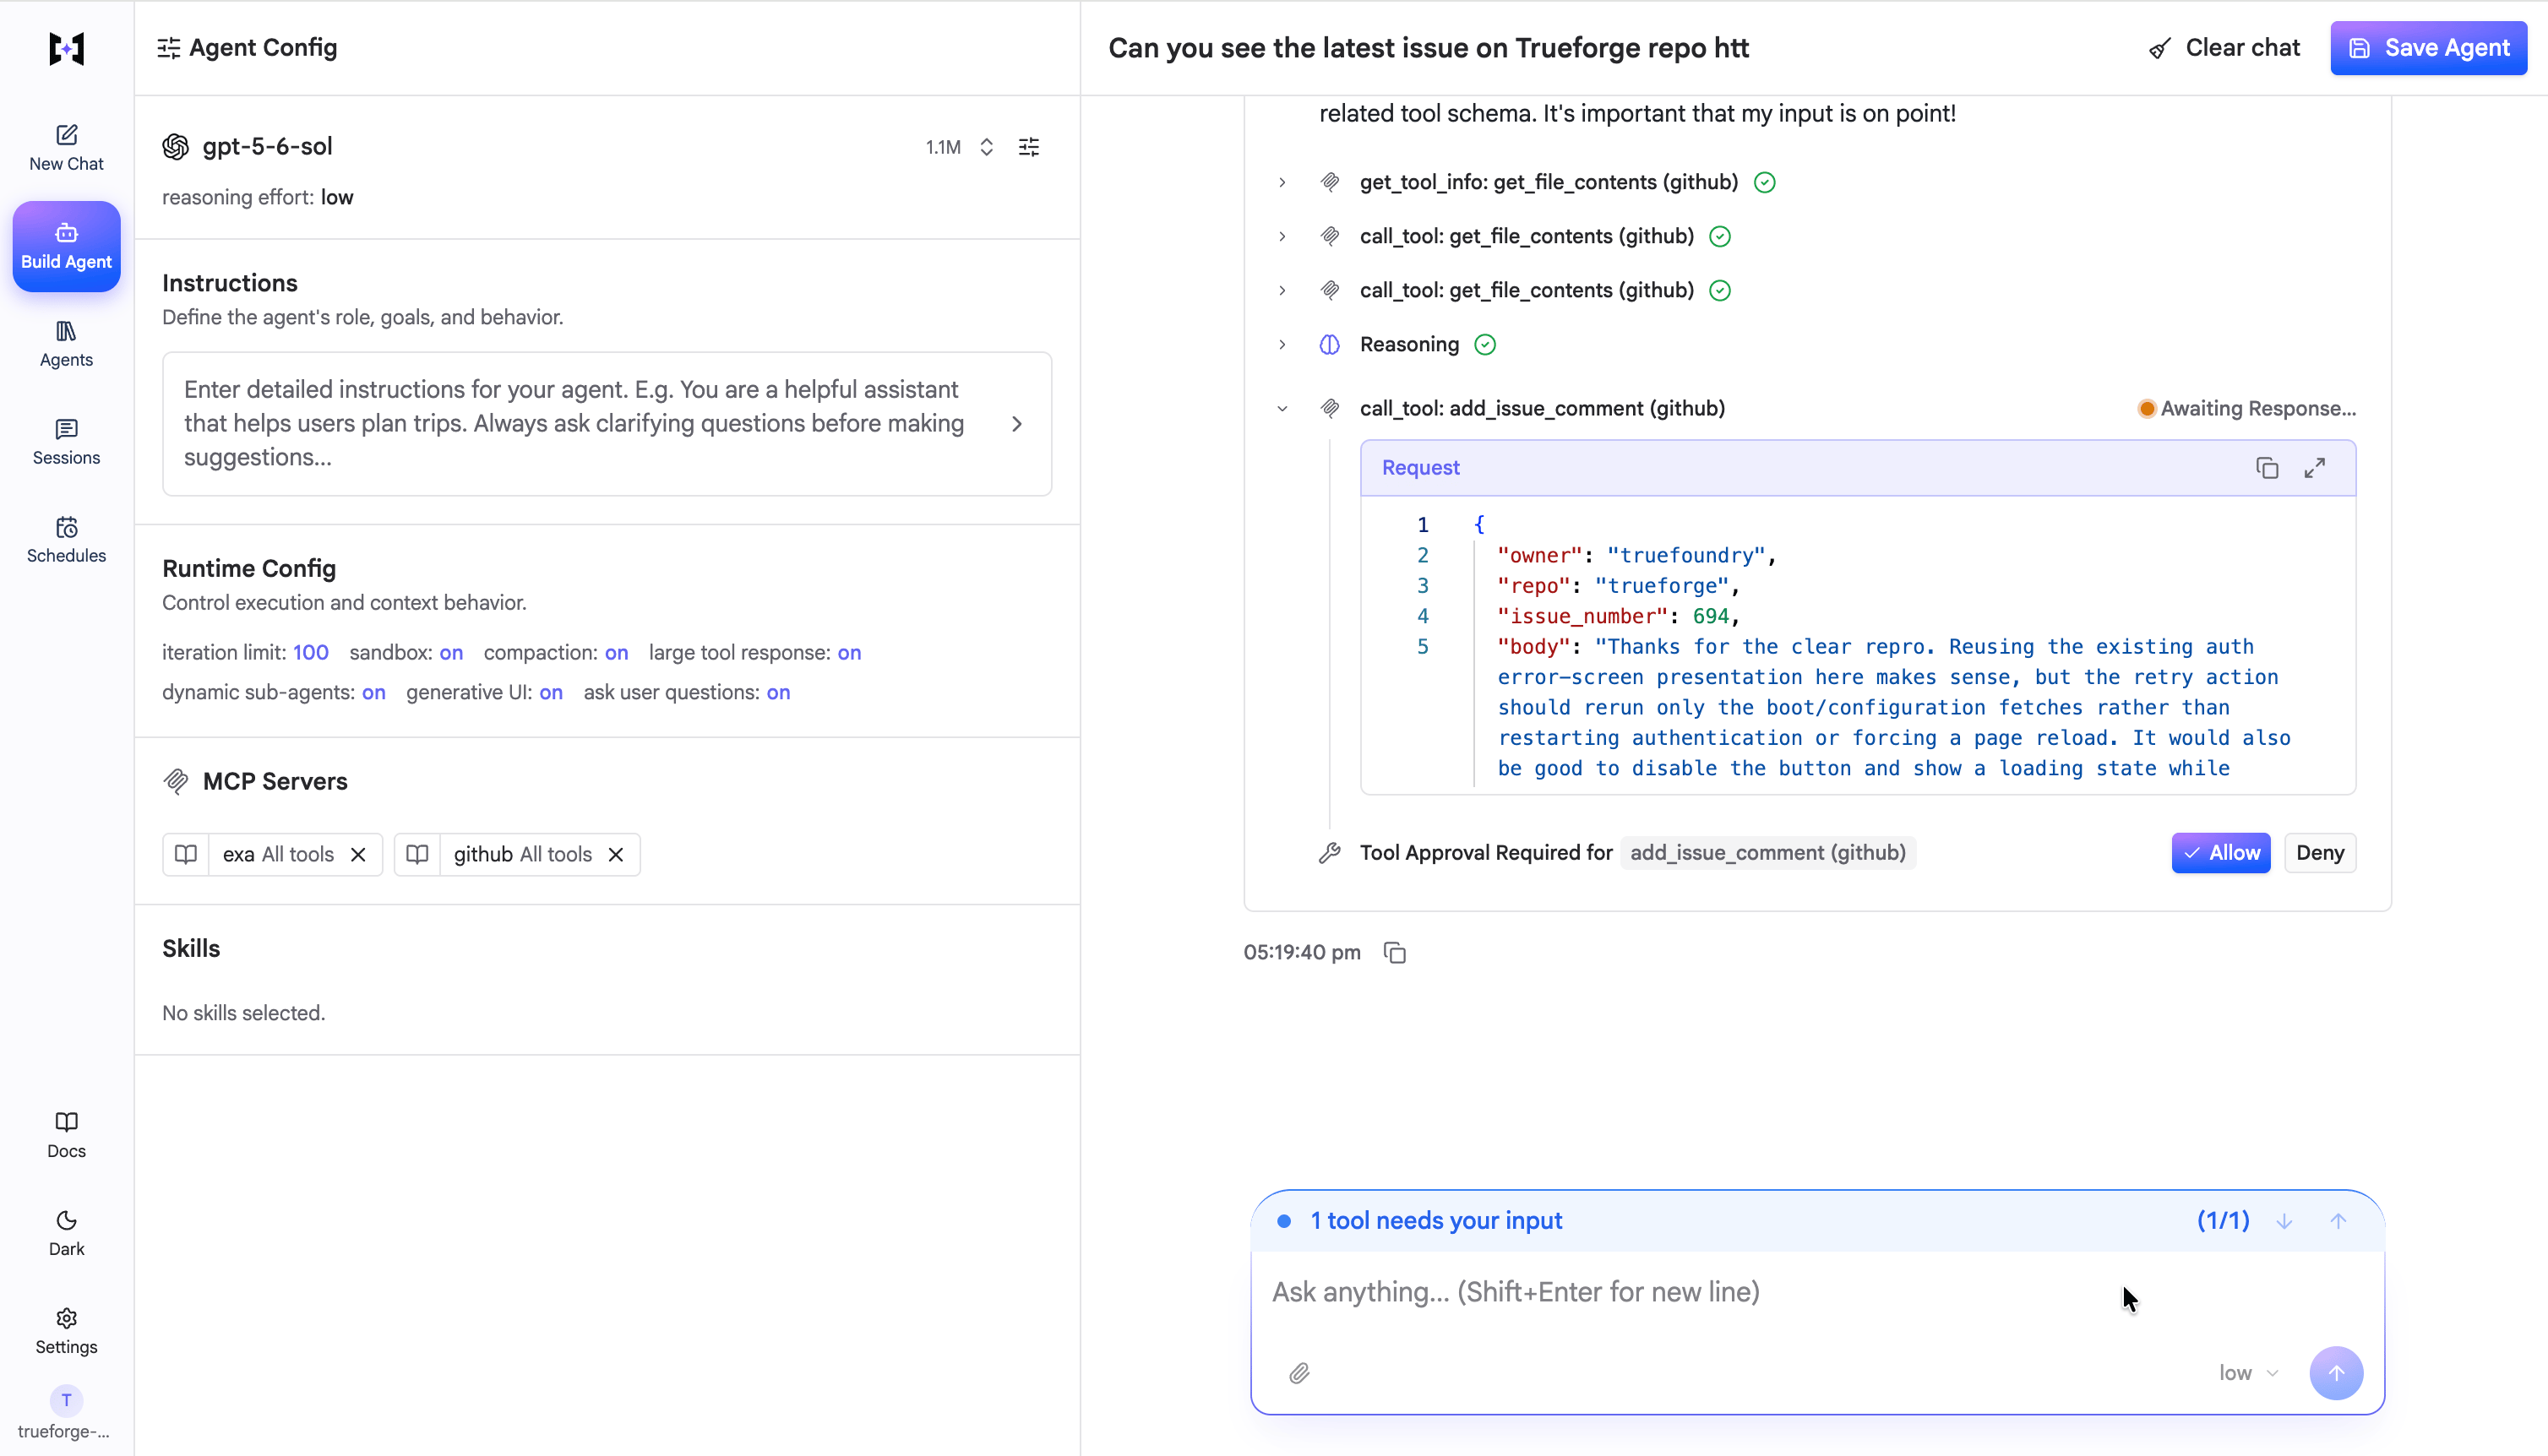
The chat UI pauses on a sensitive tool call with Allow / Deny.
require_approval_for_tools to @all, @write, @destructive, or literal tool names.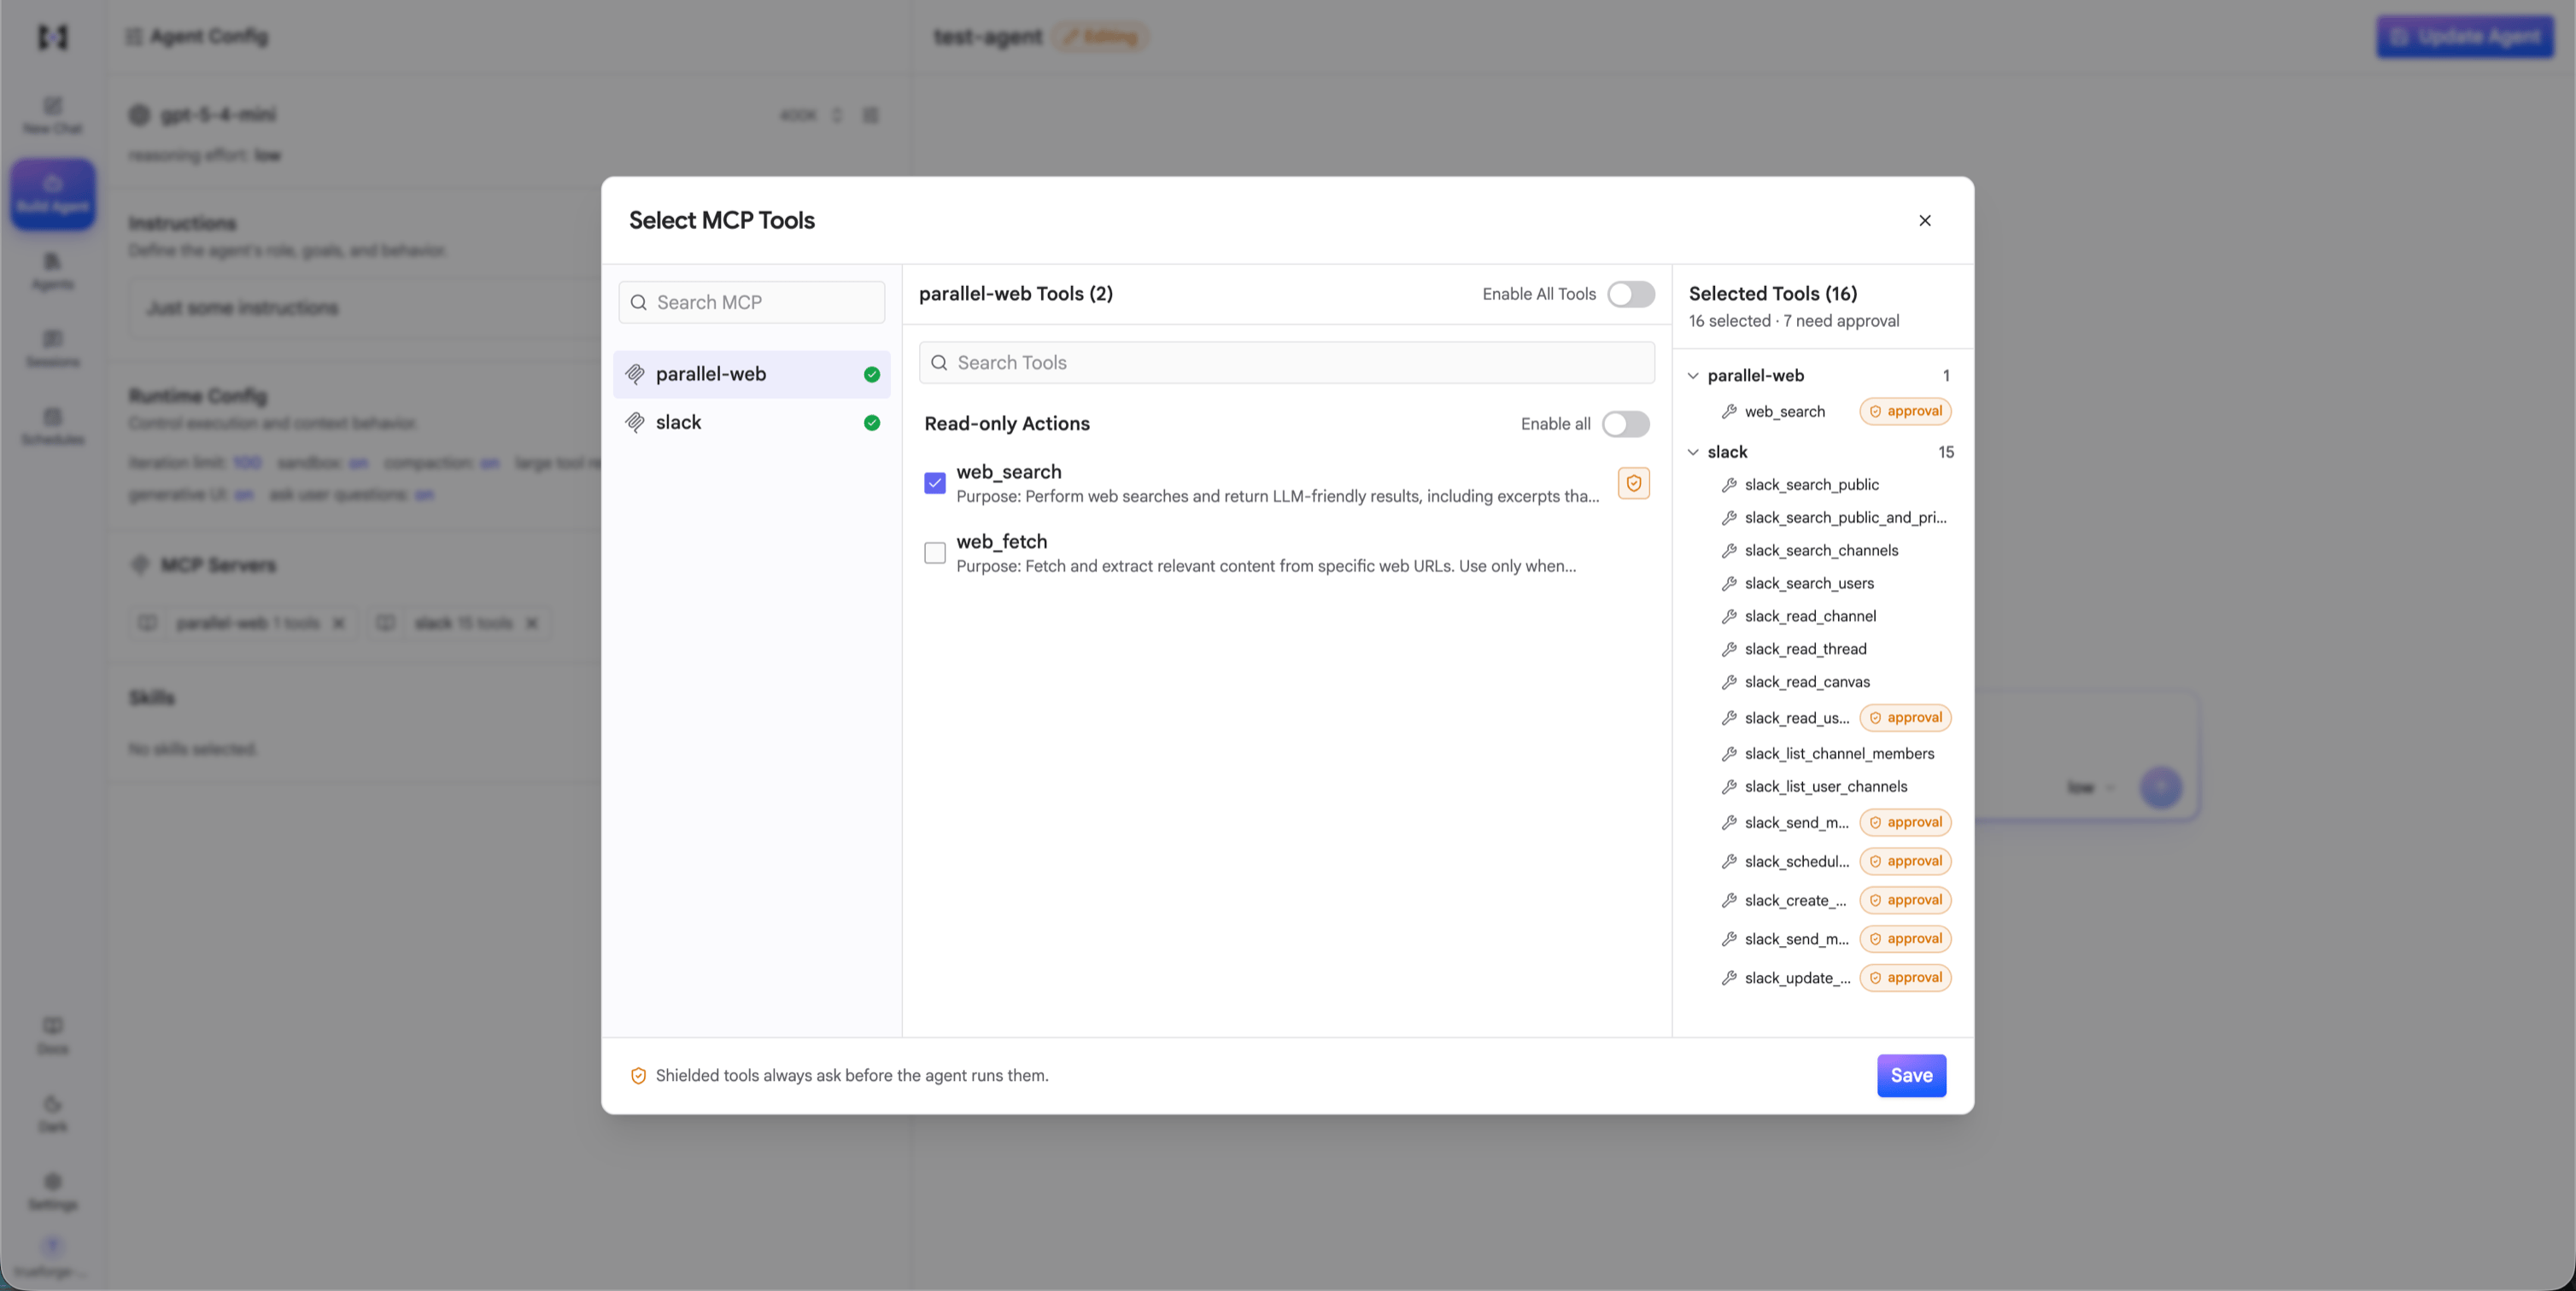
The shield on an enabled tool row toggles approval; the Selected Tools panel counts how many are gated.
read / write / destructive label and shield state.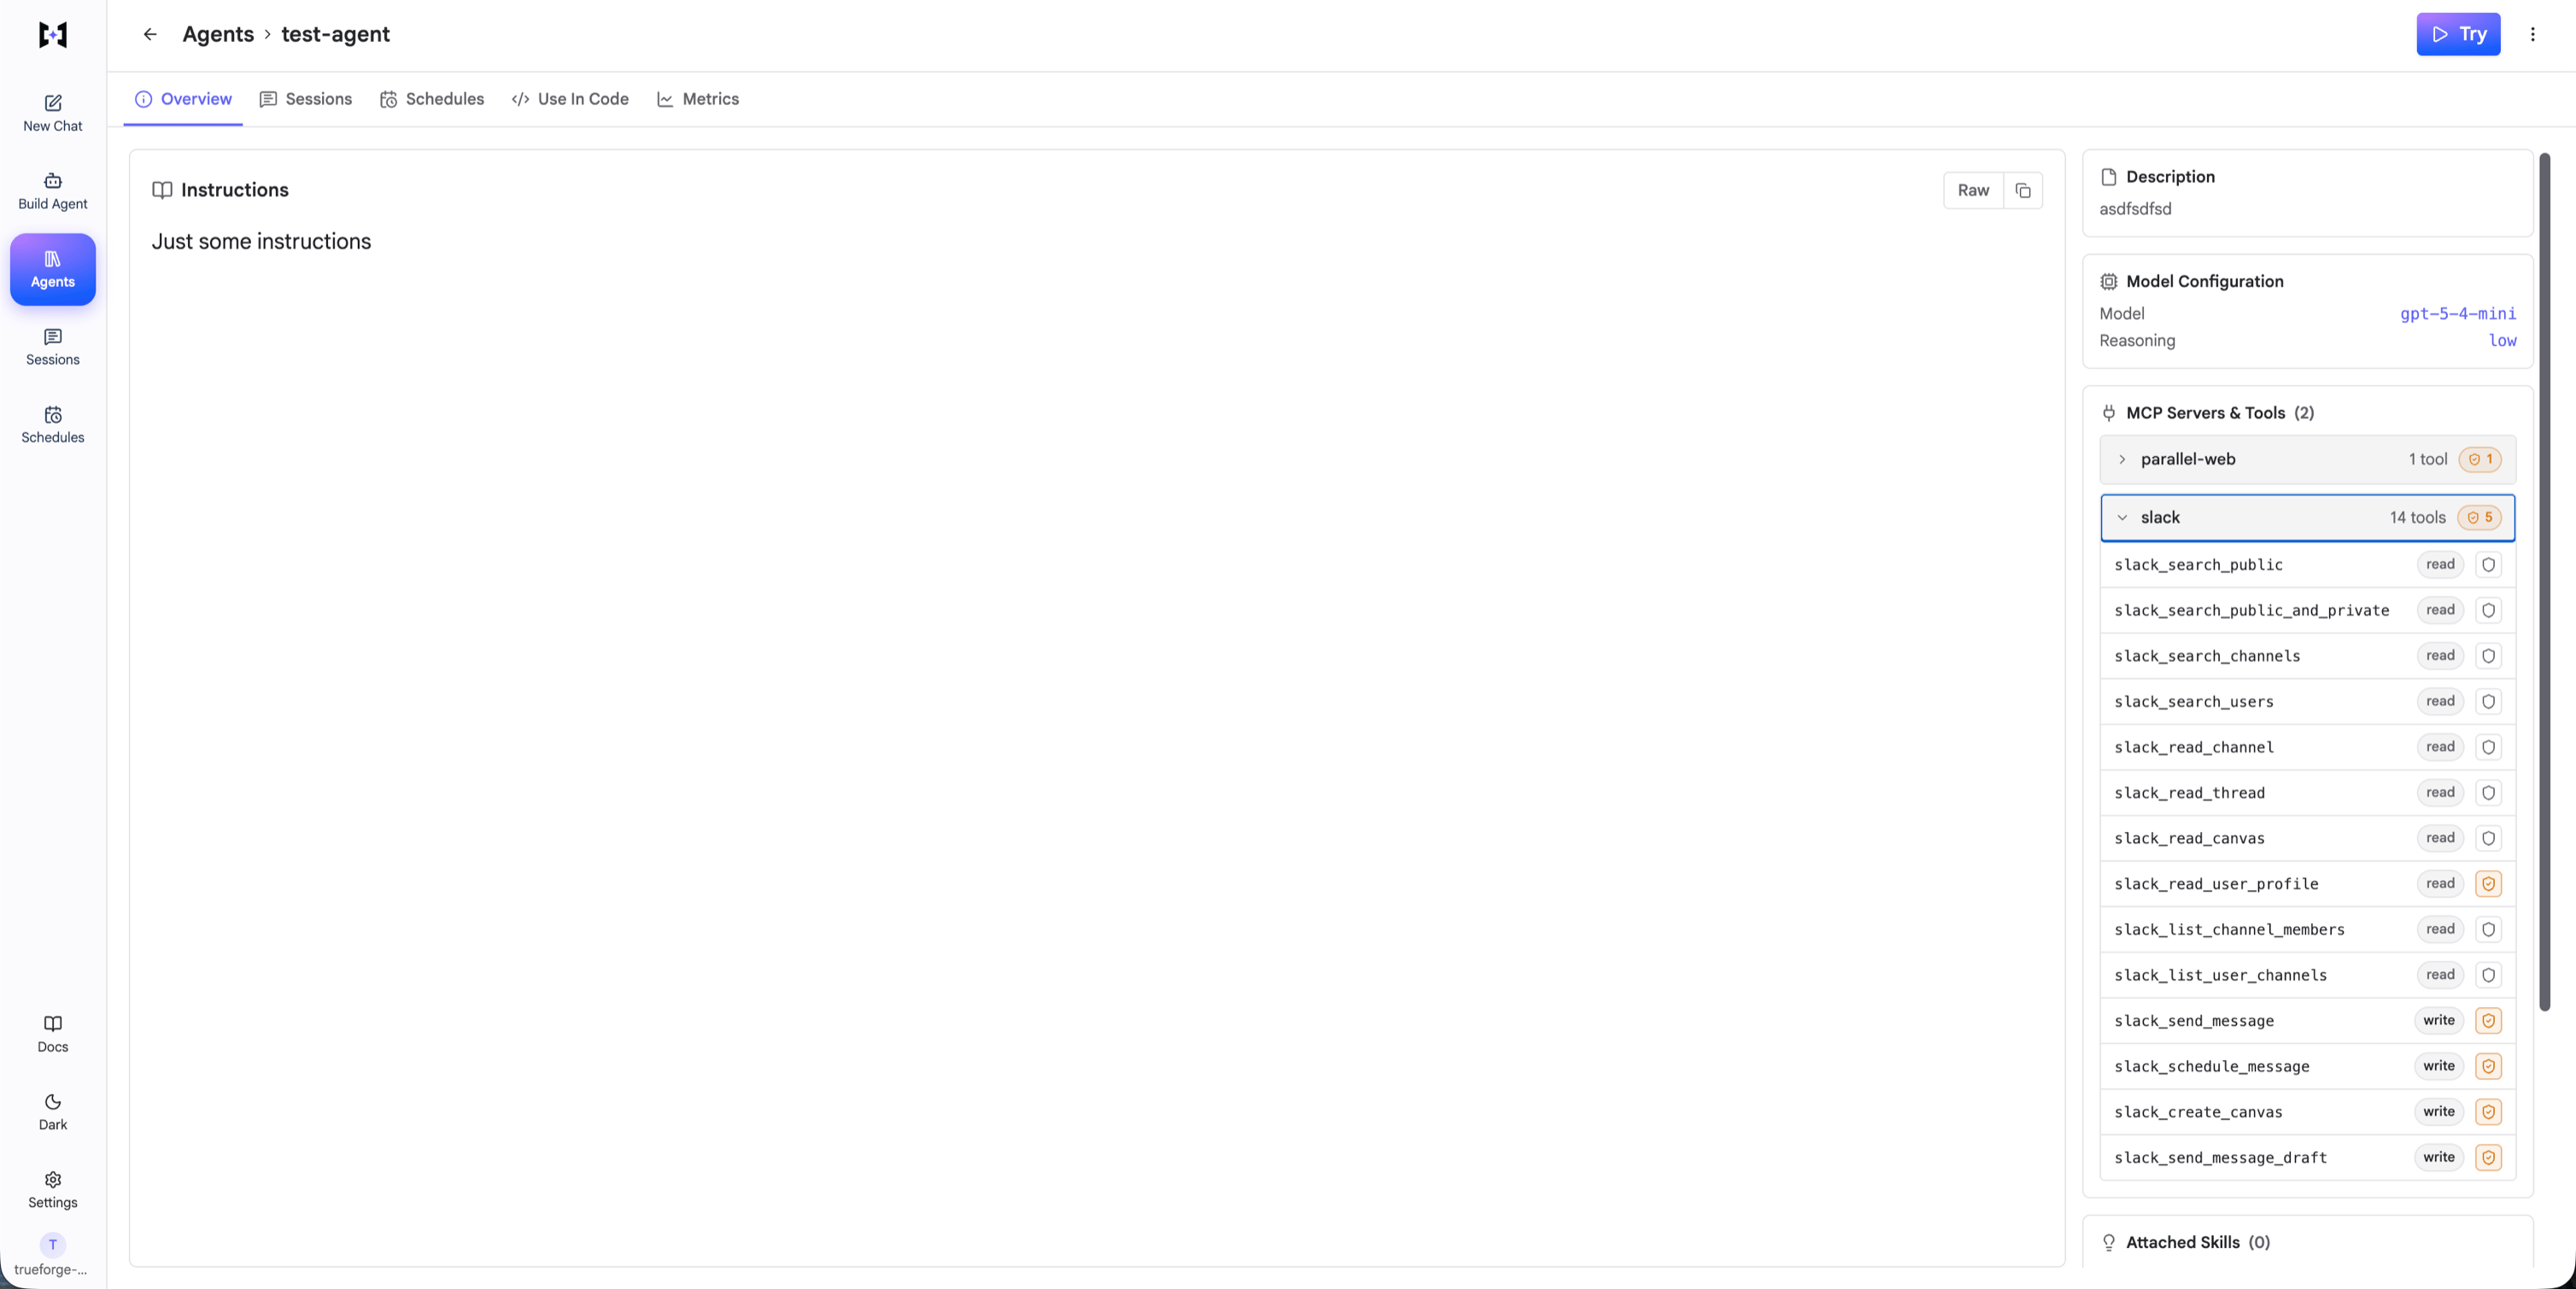
The agent Overview tab, with the slack server expanded to show each tool's annotation and shield state.
Skills
Skills
SKILL.md instruction packs that teach the agent specialized procedures — querying a database, following an escalation playbook, drafting release notes. Attach them by name; the agent loads the full skill only when it decides the skill is relevant.Attaching skills requires the agent’s sandbox to be enabled.Set in: UI + APISandbox
Sandbox
Generative UI
Generative UI
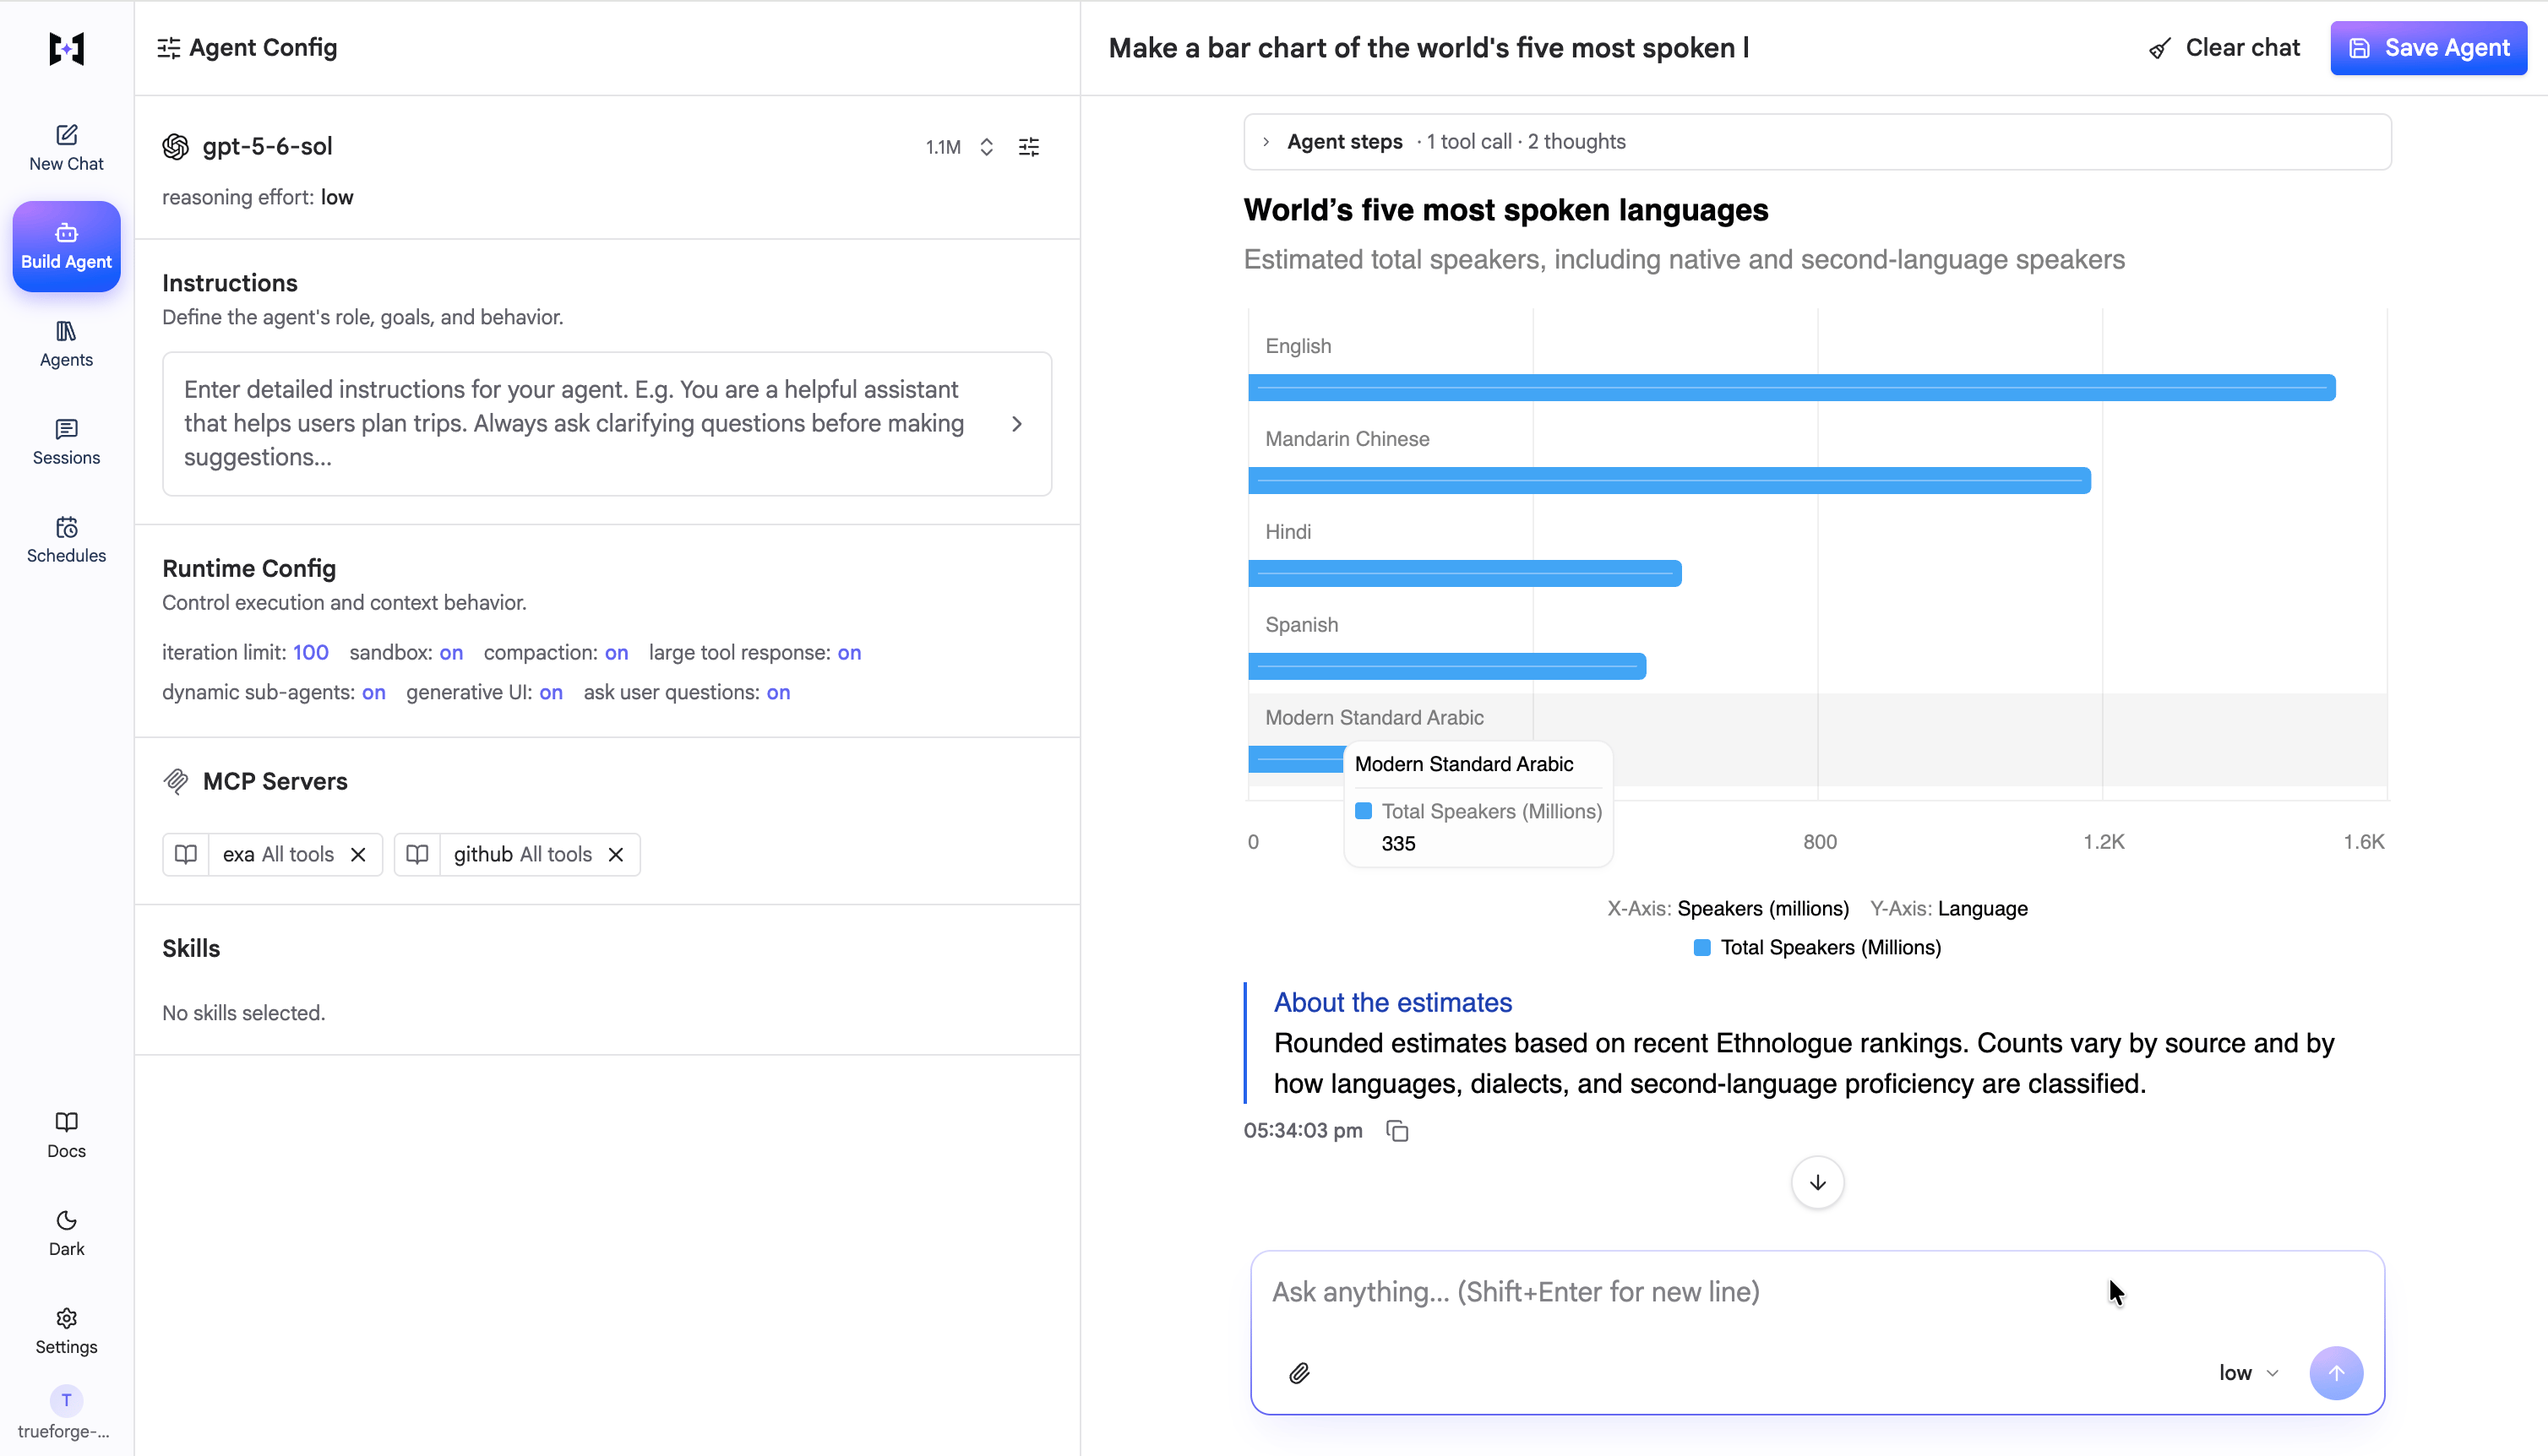
A Generative UI response with a chart rendered inline in chat.
Ask clarifying questions
Ask clarifying questions
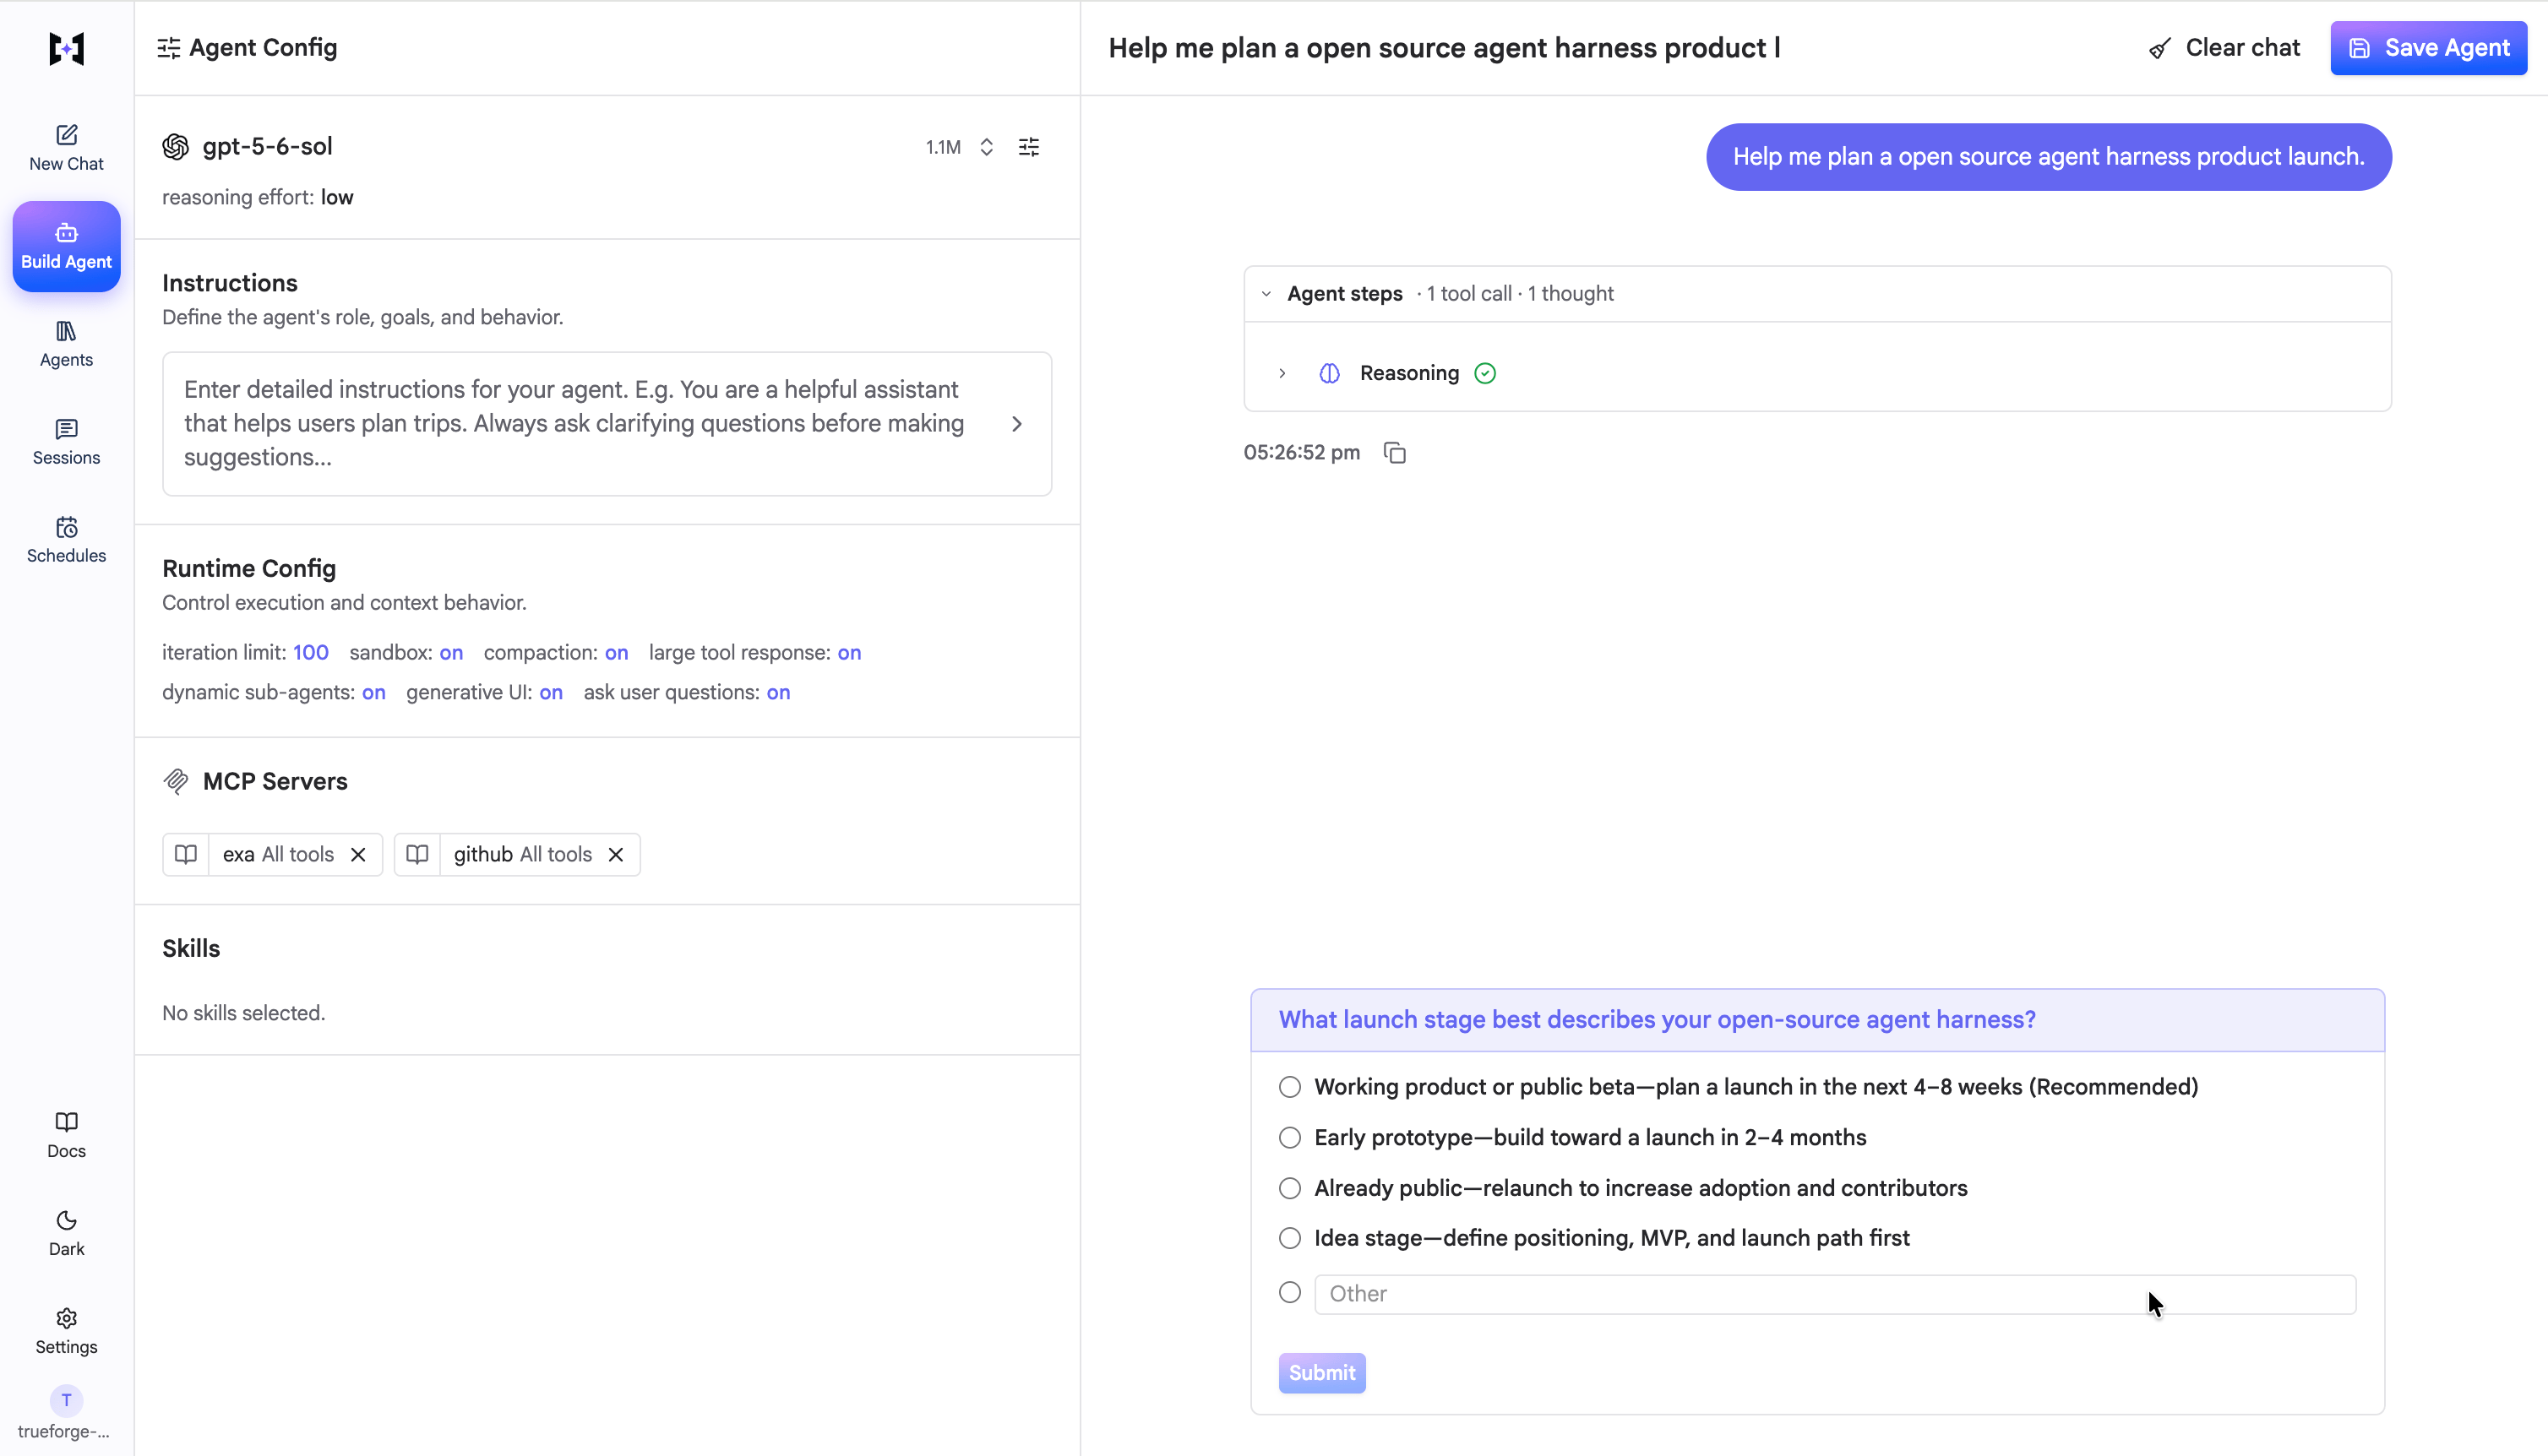
The chat UI renders the question and options as a selectable card.
Dynamic sub-agents
Dynamic sub-agents
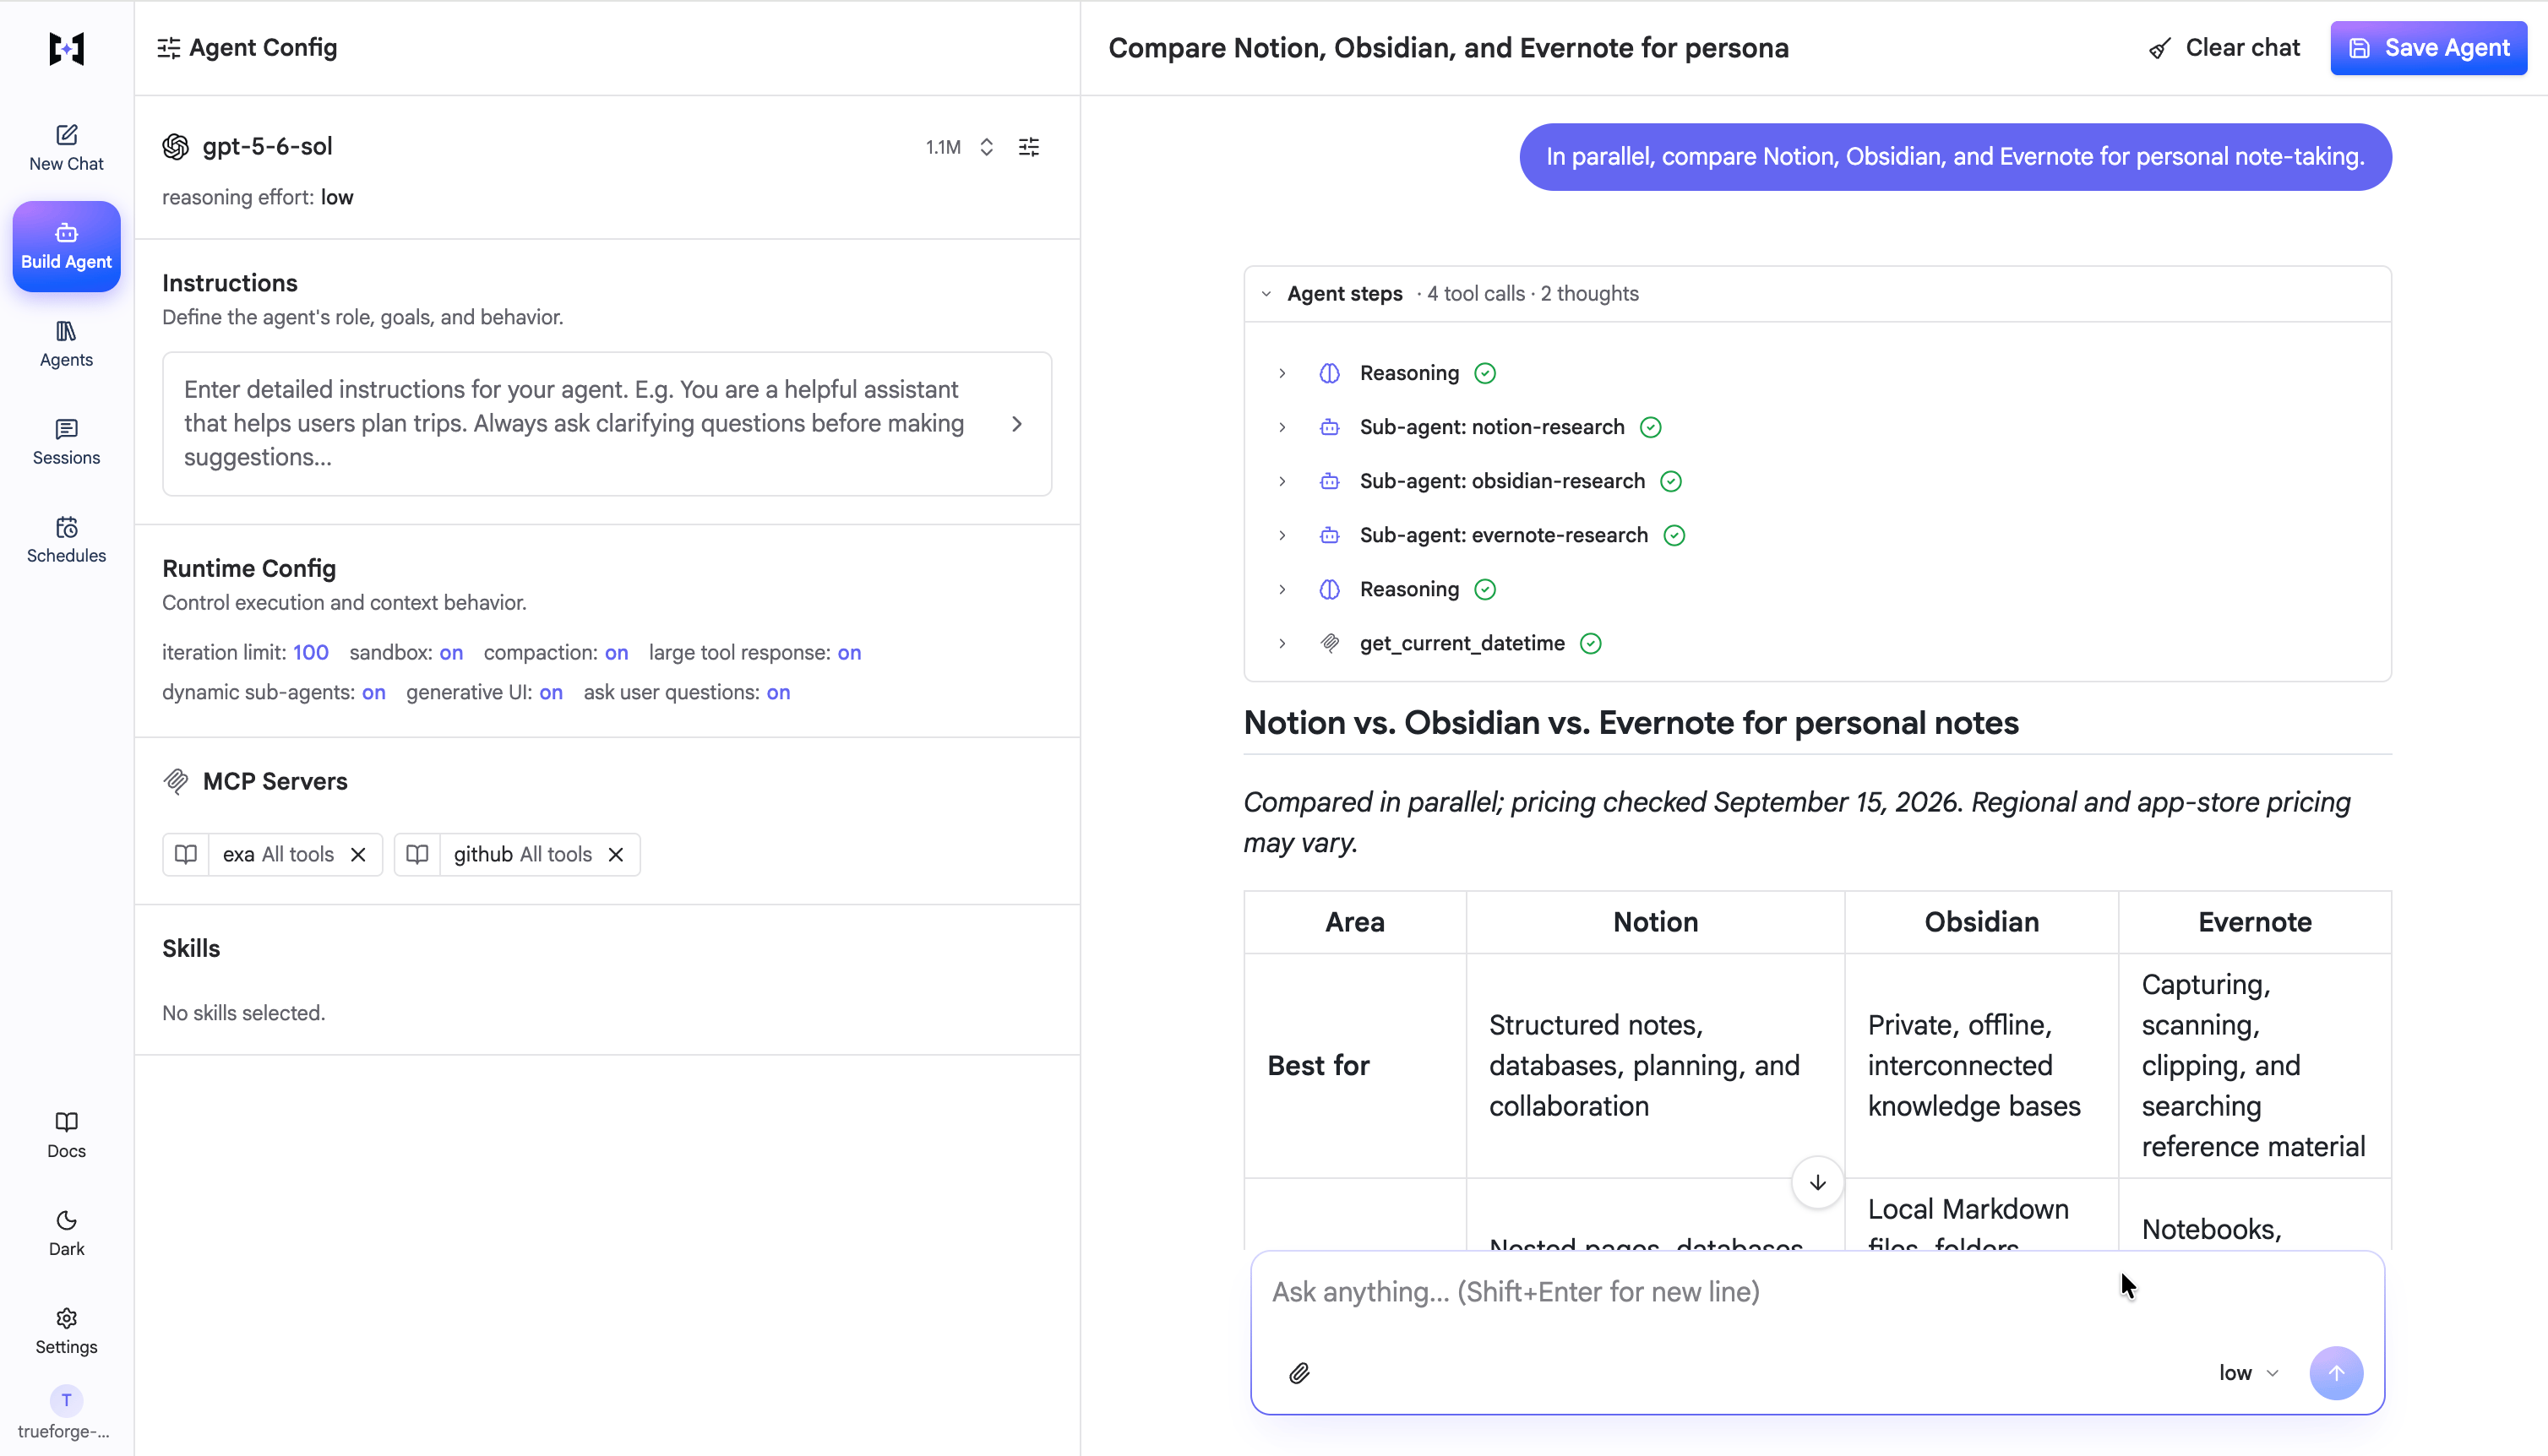
The agent fans out to parallel subagents, each shown as its own trace under Agent steps.
Context management
Context management
Iteration limit
Iteration limit
Response format (API only)
Response format (API only)
Seed messages (API only)
Seed messages (API only)
Create an agent via the UI
Open Build Agent from the sidebar. The Agent Config panel on the left is where you assemble the agent; the chat on the right lets you test it as you go.- Select a model from the providers you configured under Settings → Models, and set its reasoning effort.
- Write focused instructions — role, audience, and behavior.
- Add MCP servers — open Select MCP Tools, pick the servers the agent should use, and choose which of their tools to enable. Use the shield on a tool to require approval before it runs — destructive tools are gated by default. Set a server’s preload toggle on its chip to load its tools upfront.
- Add skills if the agent should follow specialized procedures (requires sandbox enabled).
- Open Runtime Config to review execution and context behavior — Dynamic sub-agents, Generative UI, Ask user questions, the sandbox, iteration limit, and context compaction (all on by default).
- Click Save Agent, give it a name and description, and save. It then appears under Agents.
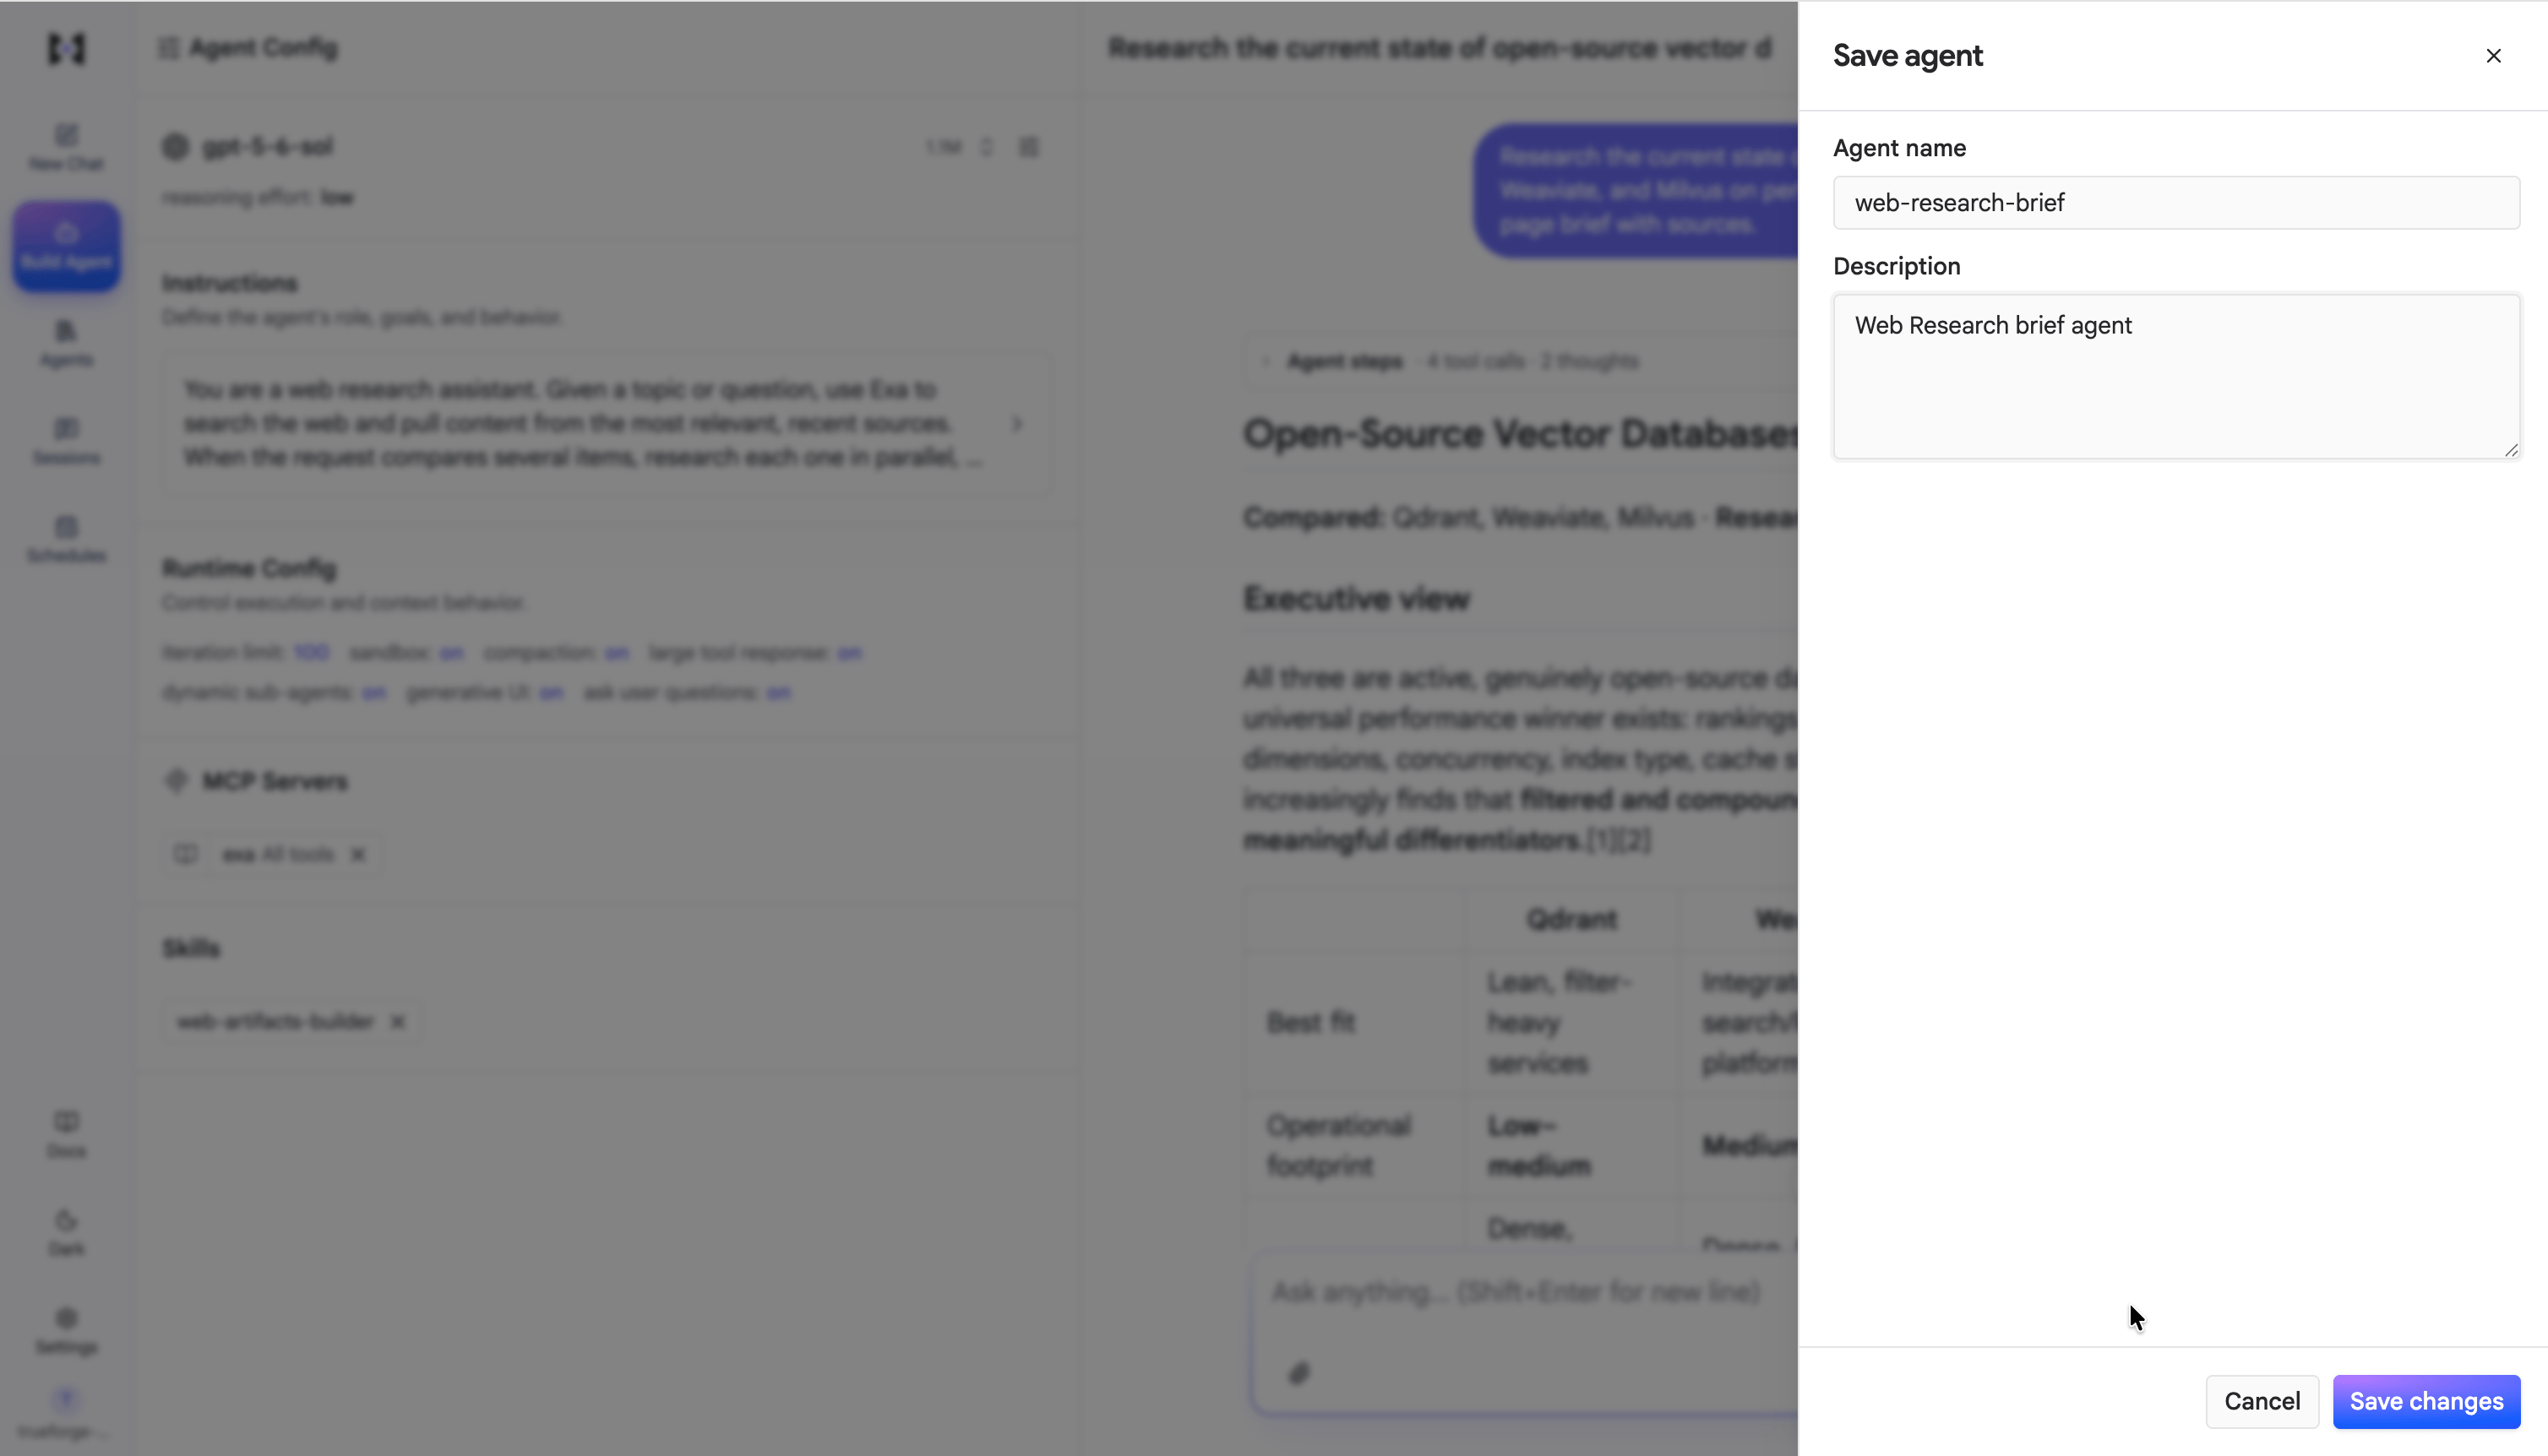
Save a reusable agent from the Build Agent page.
Create an agent via the API
The SDK and HTTP API expose every option through the agent spec. You either save the spec as a named, reusable agent and reference it by name, or pass it inline when you open a session. All fields aresnake_case, and every field except model has a default.
Save and run an agent
Connect the client
token.Save the spec as a named agent
agents.create (POST /api/v1/agents) stores the spec under a unique name and returns the agent with its server-generated id. The name is immutable and must be unique — a duplicate returns 409. description is required.Open a session and run turns
agents methods:
The full agent spec
Themanifest you save (or the inline spec) is the agent spec below — every field, with defaults.
model
The only required field.
model.params recognizes max_tokens, temperature, top_p, top_k, parallel_tool_calls (boolean), and reasoning_effort (string). Extra keys are allowed and forwarded to the provider as-is.
instructions
Set via: UI + API
Optional string. The agent’s system prompt — its role, behavior, and constraints.
mcp_servers
Optional array. Each entry attaches a configured MCP server by name:
@read-only, @write, and @destructive follow the labels the MCP server puts on each tool. Unlabeled tools (and tools marked read-only) are not covered by @write / @destructive, so they run without an approval pause. Gate them by name, or use @all.
skills
Set via: UI + API
Optional array of name-only references to configured skills:
., _, and - (max 64 characters). Attaching skills requires config.sandbox.enabled: true.
config
Runtime behavior. Every field has a default, so config can be omitted entirely.
config.sandbox
config.context_management
Compaction is enabled by default. When its trigger is omitted, it runs at 80% of the configured model’s context
length, or at 50,000 input tokens when that context length is unavailable.
response_format
Set via: API
Optional. Constrains the agent’s final output: { "type": "text" } (default), { "type": "json_object" }, or { "type": "json_schema", "json_schema": { ... } }.